
Genshin Impact giving away a free Standard Banner character on the anniversary has always been a meme and a dream within the community, considering Genshin is perceived as less generous compared to its competitors. Therefore, when HoYoverse announced that they’d give a free 5-star on every anniversary starting in 2024 anniversary, many Travelers were delighted.
If players are wondering which 5-star is worth getting from Genshin Impact’s anniversary, this article will list the pros and cons of each character, and the significance of their Constellations. So, whether you’re getting a C0 or copies, you’ll get the information you need.
Related
Genshin Impact Redeem Codes (September 2025)
Genshin Impact redeem codes commonly come with Primogems rewards that aid in players’ gacha experience.
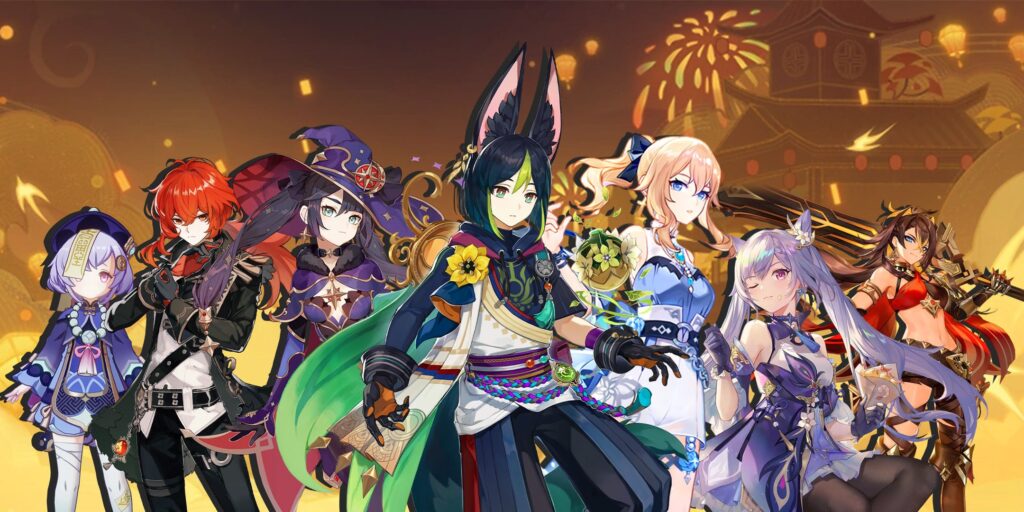
Standard Banner Characters In Genshin Impact
There are seven Standard Banner characters in Genshin Impact. Here’s a recommendation of their importance on C0:
S-Tier
A-Tier
C-Tier
Tighnari
Tighnari is one of the best characters from the Standard Banner in Genshin Impact. Even after the release of powerful Dendro DPS, he’s still relevant if you need a quick-swap damage dealer to pair with your Quicken team. Tighnari can dish out massive damage with only a few seconds of effort.
Pros & Cons
|
Pros |
|
|---|---|
|
Cons |
|
Constellation Overview
|
Constellation |
Constellation Effect |
Importance |
|---|---|---|
|
C1 |
Tighnari’s Charged Attack CRIT Rate is increased by 15%. |
Low |
|
C2 |
When there are opponents within the Vijnana-Khanda Field created by Elemental Skill, Tighnari gains 20% Dendro DMG Bonus. The effect will last up to 6s if the field’s duration ends or if it no longer has opponents within it. |
Medium |
|
C4 |
When Elemental Burst is unleashed, all nearby party members gain 60 Elemental Mastery for 8s. If the Elemental Burst triggers a Burning, Bloom, Aggravate, or Spread reaction, their Elemental Mastery will be further increased by 60. This latter case will also refresh the buff state’s duration. |
High |
|
C6 |
Wreath Arrow‘s charging time is decreased by 0.9s, and will produce 1 additional Clusterbloom Arrow upon hit. This arrow deals 150% of Tighnari’s ATK as DMG. |
Priority |
Mona
Although there are other powerful buffers in Genshin Impact, like Furina, Mona remains one of the best supports due to her simple buffing ability that doesn’t require building up. Ensure your team is ready to deal Burst damage, then use Mona’s Ult to apply Omen on enemies. Afterward, the hit that comes next (preferably Melt or Vaporize) will be insanely buffed, allowing Travelers to deal over a million damage.
Related
Genshin Impact: Best Build for Mona
Mona is a complex Genshin Impact character who is best used when exploiting her Hydro Damage abilities as a teammate to trigger Elemental Reactions.
Pros & Cons
|
Pros |
|
|---|---|
|
Cons |
|
Constellation Overview
|
Constellation |
Constellation Effect |
Importance |
|---|---|---|
|
C1 |
When any of your own party members hits an opponent affected by an Omen, the effects of Hydro-related Elemental Reactions are enhanced for 8s. Electro-Charged DMG increases by 15%, Vaporize DMG increases by 15%, Hydro Swirl DMG increases by 15%, and Frozen duration is extended by 15%. |
Priority |
|
C2 |
When a Normal Attack hits, there is a 20% chance that it will be automatically followed by a Charged Attack. This effect can only occur once every 5s. |
Medium |
|
C4 |
When any party member attacks an opponent affected by an Omen, their CRIT Rate is increased by 15%. |
High |
|
C6 |
Upon entering Illusory Torrent, Mona gains a 60% increase to the DMG of her next Charged Attack per second of movement. A maximum DMG Bonus of 180% can be achieved in this manner. The effect lasts for no more than 8s. |
Medium |
Jean
Even though there are many other healers in Genshin Impact, Jean is still highly relevant and excels in her niche. Additionally, unlike some characters on this list, Jean’s value continues to rise with her Constellations, so it’s worth collecting her copies slowly.
Not to mention that she’s one of the most beloved characters, being the first leader players meet when they first start the game in Mondstadt.
Pros & Cons
|
Pros |
|
|---|---|
|
Cons |
|
Constellation Overview
|
Constellation |
Constellation Effect |
Importance |
|---|---|---|
|
C1 |
Increases the pulling speed of Gale Blade after holding for more than 1s, and increases the DMG dealt by 40%. |
Medium |
|
C2 |
When Jean picks up an Elemental Orb/Particle, all party members have their Movement SPD and ATK SPD increased by 15% for 15s. |
Priority |
|
C4 |
Within the Field created by Dandelion Breeze, all opponents have their Anemo RES decreased by 40%. |
Priority |
|
C6 |
Incoming DMG is decreased by 35% within the Field created by Dandelion Breeze. Upon leaving the Dandelion Field, this effect lasts for 3 attacks or 10s. |
Medium |
Mizuki
Mizuki is an on-field character in Genshin Impact who exclusively works with the Swirl reaction. She needs to be the active character, and she only walks around while doing her job, so her teammates should consist of off-field damage dealers that require no trigger, unlike Xingqiu and Yelan. Ideal teammates for Mizuki include characters like Furina, Fischl, Raiden Shogun, Yae Miko, Ororon, Xiangling, and so on.
Mizuki is easy to build and work with a lot of 4-star characters, making her a rather F2P friendly unit, great for new players.
Pros & Cons
|
Pros |
|
|---|---|
|
Cons |
|
Constellation Overview
|
Constellation |
Constellation Effect |
Importance |
|---|---|---|
|
C1 |
When Yumemizuki Mizuki is in the Dreamdrifter state, she will continuously apply the “Twenty-Three Nights’ Awaiting” effect to nearby opponents for 3s every 3.5s. When an opponent is affected by Anemo DMG-triggered Swirl reactions while the aforementioned effect is active, the effect will be canceled and this Swirl instance has its DMG against this opponent increased by 1,100% of Mizuki’s Elemental Mastery. |
Medium |
|
C2 |
When Yumemizuki Mizuki enters the Dreamdrifter state, every Elemental Mastery point she has will increase all nearby party members’ Pyro, Hydro, Cryo, and Electro DMG Bonuses by 0.04% until the Dreamdrifter state ends. |
High |
|
C4 |
Picking up a Yumemi Style Special Snack from the Elemental Burst Anraku Secret Spring Therapy will both deal DMG and heal, and will restore 5 Energy to Yumemizuki Mizuki. Energy can be restored this way 4 times per Anraku Secret Spring Therapy duration. |
Medium |
|
C6 |
While Yumemizuki Mizuki is in the Dreamdrifter state, Swirl DMG dealt by nearby party members can Crit, with CRIT Rate fixed at 30%, and CRIT DMG fixed at 100%. |
Priority |
Keqing
Keqing rediscovers her value with the release of Dendro in Genshin Impact 3.0. Now, her fast multi-hit gets even stronger, allowing Keqing fans to bring her back into the Spiral Abyss.
Related
Genshin Impact: The Best Builds For Keqing
Keqing is a great character if used right. Here are some of the best builds for this fan-favorite character.
Pros & Cons
|
Pros |
|
|---|---|
|
Cons |
|
Constellation Overview
|
Constellation |
Constellation Effect |
Importance |
|---|---|---|
|
C1 |
Recasting Stellar Restoration while a Lightning Stiletto is present causes Keqing to deal 50% of her ATK as AoE Electro DMG at the start point and terminus of her Blink. |
Negligible |
|
C2 |
When Keqing’s Normal and Charged Attacks hit opponents affected by Electro, they have a 50% chance of producing an Elemental Particle. This effect can only occur once every 5s. |
Negligible |
|
C4 |
For 10s after Keqing triggers an Electro-related Elemental Reaction, her ATK is increased by 25%. |
Medium |
|
C6 |
When initiating a Normal Attack, a Charged Attack, Elemental Skill, or Elemental Burst, Keqing gains a 6% Electro DMG Bonus for 8s. Effects triggered by Normal Attacks, Charged Attacks, Elemental Skills, and Elemental Bursts are considered independent entities. |
Medium |
Diluc
Diluc was the most adored character in Genshin Impact 1.0, but his stardom quickly faded when Hu Tao was released shortly after. Although he’s now overshadowed by other Pyro DPS, he’s still an amazing starter unit to have if you’re new to Teyvat.
Pros & Cons
|
Pros |
|
|---|---|
|
Cons |
|
Constellation Overview
|
Constellation |
Constellation Effect |
Importance |
|---|---|---|
|
C1 |
Diluc deals 15% more DMG to opponents whose HP is above 50%. |
Medium |
|
C2 |
When Diluc takes DMG, his ATK increases by 10%, and his ATK SPD increases by 5%. Lasts for 10s. This effect can stack up to 3 times and can only occur once every 1.5s. |
Medium |
|
C4 |
Casting Elemental Skill in rhythm greatly increases damage dealt. 2s after casting Searing Onslaught, casting the next Searing Onslaught in the combo deals 40% additional DMG. This effect lasts for 2s. |
High |
|
C6 |
After casting Searing Onslaught, the next 2 Normal Attacks within the next 6s will have their DMG and ATK SPD increased by 30%. Additionally, Searing Onslaught will not interrupt the Normal Attack combo. |
Priority |
Qiqi
When one questions solely the capability of healing, Qiqi is far from useless. In fact, she’s still one of the best healers there is. Sadly, other characters are equipped with additional abilities, making Qiqi less favored in Genshin Impact.
Pros & Cons
|
Pros |
|
|---|---|
|
Cons |
Constellation Overview
|
Constellation |
Constellation Effect |
Importance |
|---|---|---|
|
C1 |
When the Herald of Frost hits an opponent marked by a Fortune-Preserving Talisman, Qiqi regenerates 2 Energy. |
Medium |
|
C2 |
Qiqi’s Normal and Charge Attack DMG against opponents affected by Cryo is increased by 15%. |
Low |
|
C4 |
Targets marked by the Fortune-Preserving Talisman have their ATK decreased by 20%. |
Low |
|
C6 |
Using Adeptus Art: Preserver of Fortune revives all fallen party members nearby and regenerates 50% of their HP. This effect can only occur once every 15 minutes. |
Priority |
Dehya
It’s sad that Dehya didn’t live up to her potential due to some weird design choices from the developer. She could’ve been an amazing tanker and sub-DPS with slight tinkering of her kit, but it feels like HoYoverse gave up on her midway.
Related
Genshin Impact: Best Dehya Build Guide
Genshin Impact Dehya comes to the game with fresh new mechanics, so her build is not easy to determine.
Pros & Cons
|
Pros |
|
|---|---|
|
Cons |
|
Constellation Overview
|
Constellation |
Constellation Effect |
Importance |
|---|---|---|
|
C1 |
Dehya’s Max HP is increased by 20%, and she deals bonus DMG based on her Max HP when using the following attacks:
|
High |
|
C2 |
When Dehya uses Molten Inferno: Ranging Flame, the duration of the recreated Fiery Sanctum field will be increased by 6s. Additionally, when a Fiery Sanctum exists on the field, DMG dealt by its next coordinated attack will be increased by 50% when active character(s) within the Fiery Sanctum field are attacked. |
Priority |
|
C4 |
When Flame-Mane’s Fist and Incineration Drive attacks unleashed during Leonine Bite hit opponents, they will restore 1.5 Energy for Dehya and 2.5% of her Max HP. This effect can be triggered once every 0.2s. |
Low |
|
C6 |
The CRIT Rate of Leonine Bite is increased by 10%. Additionally, after a Flame-Mane’s Fist attack hits an opponent and deals CRIT Hits during a single Blazing Lioness state, it will cause the CRIT DMG of Leonine Bite to increase by 15% for the rest of Blazing Lioness’s duration and extend that duration by 0.5s. This effect can be triggered every 0.2s. The duration can be extended for a maximum of 2s and CRIT DMG can be increased by a maximum of 60% this way. |
Medium |
- Released
-
September 28, 2020
- ESRB
-
Teen / Alcohol Reference, Fantasy Violence, In-Game Purchases (Includes Random Items), Users Interact